Skip the Store: Make Crunchy, Cheap, & Healthy Corn Nuts
There's something undeniably satisfying about a snack with a serious crunch. Whether you're curled up with a book, watching a movie, or just need a savory pick-me-up, crunchy treats hit different. Among the pantheon of satisfying snacks, corn nuts hold a special place. Their robust texture and distinctive flavor make them a favorite, but the store-bought versions often come with a hefty price tag and a list of ingredients that might make you pause. What if we told you that you could replicate that beloved crunch, save money, and have complete control over what goes into your snack, all with just
4 simple ingredients? Get ready to transform humble dried corn into delectable, homemade
roasted corn kernel nuts!
This article will guide you through the surprisingly easy process of making your own crunchy corn nuts, revealing why this DIY approach is superior to store-bought options, and how you can customize them to perfection. Say goodbye to overpriced bags and hello to your new favorite healthy, budget-friendly snack.
Why Homemade Roasted Corn Kernel Nuts Are a Game-Changer
The allure of homemade snacks isn't just about the joy of creation; it's about making smarter choices for your wallet and your well-being. When it comes to corn nuts, the benefits of going DIY are particularly pronounced.
Unbeatable Value and Cost-Effectiveness
Let's talk numbers. A small, often single-serving bag of branded corn nuts from the grocery store can easily set you back around $4. If you're anything like most snack enthusiasts, that "1.5 serving" bag vanishes in one sitting, making it an expensive habit. Compare that to the cost of the raw materials for homemade versions: a 16 oz bag of dried whole kernel corn typically costs about $2.50. This single bag yields a substantial amount – enough to fill about one and a half quart-sized mason jars – which is vastly more than what you get from a store-bought bag. The other ingredients – cooking oil, salt, and sugar – are pantry staples you likely already have on hand. The savings add up quickly, allowing you to enjoy your crunchy fix without breaking the bank.
Total Control Over Ingredients and Health Benefits
One of the biggest advantages of making your own snacks is knowing exactly what you're consuming. Store-bought corn nuts often contain a long list of additives, artificial flavors, and excessive sodium. When you make your own
roasted corn kernel nuts, you dictate the quality and quantity of every ingredient.
*
Simpler Ingredients: You're using dried corn, a healthy whole grain, along with minimal oil and seasonings. This cuts out unnecessary preservatives, artificial colors, and flavor enhancers.
*
Customizable Seasoning: Craving less salt? More spice? No sugar? It's all in your hands. This allows you to tailor the snack to your dietary preferences and health goals, making it genuinely healthy.
*
Improved Texture: Many find commercial corn nuts to be excessively hard, sometimes even a challenge for your teeth. Homemade versions, when prepared correctly, achieve a satisfying crunch that's robust but not punishing, offering a more enjoyable eating experience.
Surprisingly Easy and Quick to Prepare
While there's an overnight soaking step involved, the active preparation time for homemade corn nuts is minimal. Once the corn is soaked, rinsed, and seasoned, it's mostly a hands-off baking process. This simplicity, combined with the mere
4 ingredients required, makes it an accessible project for even novice home cooks.
Unlocking the Perfect Crunch: Your 4-Ingredient Recipe
The secret to perfectly crunchy
roasted corn kernel nuts lies in understanding the few, yet crucial, steps and ingredients. This simple recipe proves that gourmet results don't require complex methods. For a deep dive into achieving that ideal snap, check out
Achieve Perfect Crunch: The Ultimate Homemade Corn Nut Recipe.
The Essential Ingredients (Just 4!)
Before we begin, gather these simple items:
1.
Dried Whole Kernel Corn: This is paramount. Do NOT use popcorn kernels; they are too small and will not yield the desired texture. Look for "dried whole kernel corn" or "hominy corn" in the dried beans/grains section of your grocery store.
2.
Cooking Oil: A neutral oil like vegetable oil, canola oil, or even a light olive oil works best. This helps achieve that coveted crispness and allows seasonings to adhere.
3.
Salt: Essential for flavor. Fine sea salt or kosher salt is ideal.
4.
Sugar: Optional, but a touch of sugar beautifully balances the savoriness and enhances the corn's natural sweetness, creating that classic corn nut flavor profile.
Step-by-Step Guide to Crunchy Perfection
Making your own roasted corn kernel nuts is an exercise in patience and precision, especially during the baking phase. But trust us, the reward is worth it!
1.
The Crucial Soak (12+ Hours): This is the most important step. Place your dried whole kernel corn in a large bowl and cover it generously with cold water. The corn will expand significantly, so ensure there's plenty of room and water. Let it soak overnight, or for at least 12 hours. This rehydrates the corn, softening it sufficiently to achieve a tender interior and a crisp exterior when roasted, preventing them from becoming excessively hard.
2.
Rinse and Drain Thoroughly: After soaking, drain the corn completely and give it a good rinse under cold water. The next step is critical for crunch: pat the corn very dry with paper towels. Excess moisture will steam the corn instead of roasting it, hindering that perfect crispness. You can even let it air dry on a clean kitchen towel for an hour for extra assurance.
3.
Season and Coat: Transfer the dried corn kernels to a clean bowl. Drizzle with 1-2 tablespoons of your chosen cooking oil, ensuring every kernel is lightly coated. The oil is key for even browning and crisping. Next, sprinkle in your salt and sugar (or any other seasonings you plan to use). Start with about 1 teaspoon of salt and 1/2 teaspoon of sugar per cup of soaked corn, adjusting to your taste. Toss everything together until the corn is evenly coated.
4.
Prepare for Roasting: Preheat your oven to around 350°F (175°C). Line a large baking sheet with parchment paper. This prevents sticking and makes cleanup a breeze. Spread the seasoned corn kernels in a single layer on the prepared baking sheet. Avoid overcrowding, as this can steam the corn instead of roasting it. Use two baking sheets if necessary.
5.
The Roasting Process – Monitor Closely!: Place the baking sheet in the preheated oven. Now, the golden rule:
keep a very close eye on them! Oven temperatures and corn varieties can vary, so baking times are approximate.
* Start by roasting for 20 minutes.
* After 20 minutes, pull out the tray and give the corn a good stir, redistributing the kernels.
* Continue baking, stirring every 10 minutes. This ensures even browning and prevents burning.
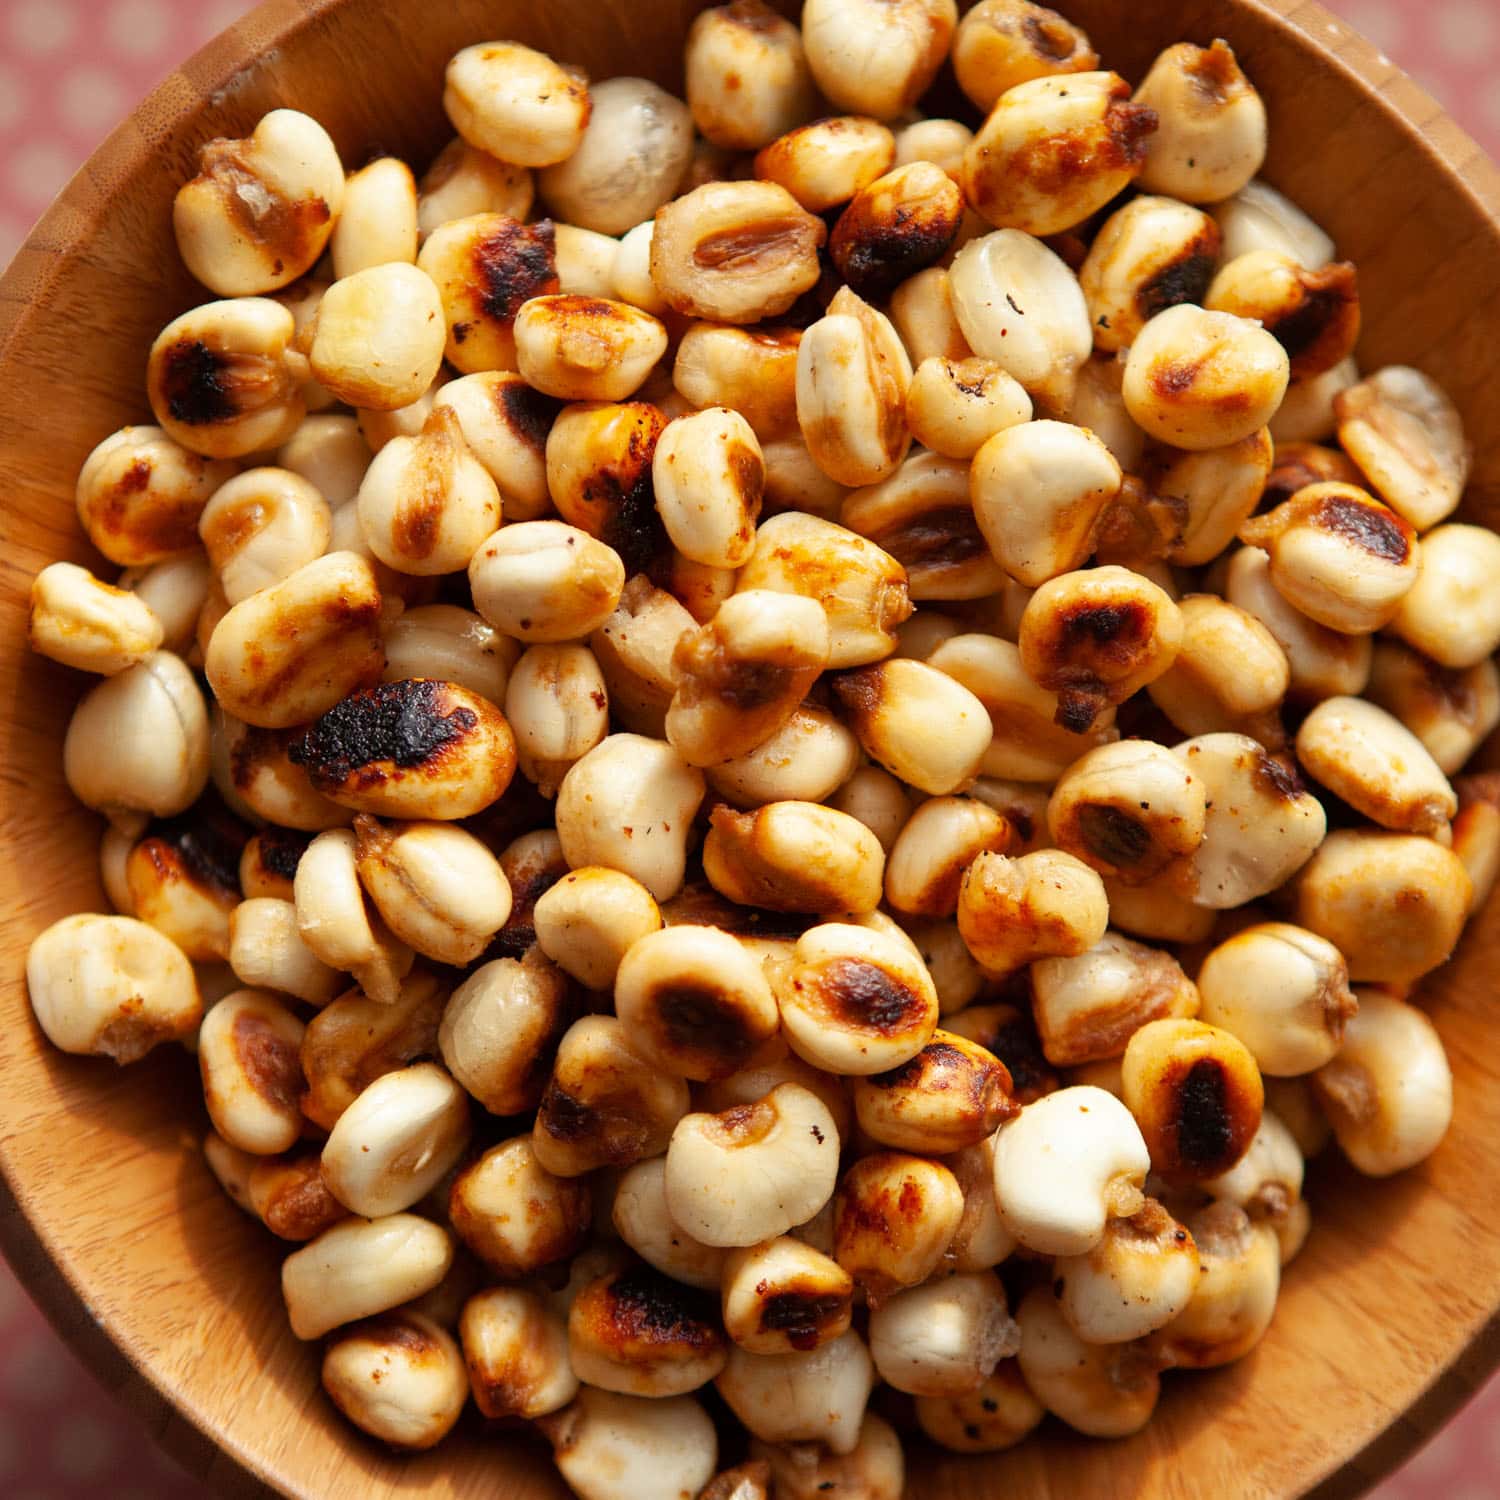
* The corn can go from perfectly golden to burnt very quickly, so vigilance is key, especially after the 30-minute mark. Look for a deep golden-brown color and a satisfying crunch when you test a kernel (let it cool slightly first!).
* Total baking time typically ranges from 30 to 50 minutes. My batches often take closer to the 40-minute mark, but some ovens might finish them in 30, while others need 50. Trust your senses and the visual cues.
6.
Cool and Enjoy: Once your
roasted corn kernel nuts are beautifully browned and crunchy, remove them from the oven and let them cool completely on the baking sheet. They will crisp up even more as they cool.
For another perspective and detailed instructions on making these incredibly simple yet satisfying snacks, be sure to read
Easy Homemade Roasted Corn Nuts: Only 4 Ingredients!.
Beyond Basic: Flavor Variations & Storage Tips
While the classic salt and sugar combination is undeniably delicious, the beauty of homemade snacks lies in their versatility. Once you've mastered the basic technique, the possibilities for flavor customization are endless.
Exciting Flavor Profiles
Let your culinary imagination run wild!
*
Spicy Kick: Add a pinch of cayenne pepper, chili powder, or smoked paprika along with the salt and sugar. For a truly fiery snack, try a dash of ghost pepper powder (use sparingly!).
*
Savory Garlic & Herb: Incorporate garlic powder, onion powder, a sprinkle of dried rosemary or thyme, and perhaps some nutritional yeast for a "cheesy" umami flavor.
*
Sweet & Cinnamon: Skip the salt and toss the roasted corn nuts with cinnamon and sugar after they come out of the oven. A pinch of nutmeg can elevate this sweet treat.
*
BBQ Bliss: Mix in a pre-made BBQ seasoning blend or create your own with paprika, brown sugar, garlic powder, and a touch of cumin.
*
Tangy Lime & Chili: After roasting, a squeeze of fresh lime juice and a dusting of chili powder (or Tajín) creates a vibrant, zesty snack.
These flavored
roasted corn kernel nuts aren't just for snacking. Sprinkle them over salads for an extra crunch, use them as a unique topping for creamy soups, or mix them into homemade trail mixes for added texture and flavor.
Optimal Storage for Maximum Crunch
Once your homemade corn nuts have cooled completely, proper storage is crucial to maintain their crispness and freshness.
*
Airtight Containers: Transfer the cooled corn nuts to an airtight container. Mason jars, food storage containers with tight-fitting lids, or sealed freezer bags are excellent choices. Exposure to air and humidity will quickly diminish their crunch.
*
Cool, Dry Place: Store the container in a cool, dry pantry away from direct sunlight. Avoid refrigeration, as the moisture can make them soft.
*
Shelf Life: Properly stored, your homemade roasted corn kernel nuts can remain fresh and crunchy for up to 2-3 weeks. However, they're so delicious, they rarely last that long!
*
Reviving Lost Crunch: If your corn nuts start to lose their crispness over time, don't despair! You can often revive them by spreading them on a baking sheet and re-roasting them in a low oven (around 250°F / 120°C) for 10-15 minutes, or until crisp again.
Troubleshooting Common Issues
*
Corn Nuts are Too Soft: This usually means they didn't roast long enough or weren't dried thoroughly after soaking. Re-roast them in the oven, stirring frequently, until they reach your desired crispness.
*
Corn Nuts are Too Hard: This could be due to not soaking them long enough, or over-roasting at too high a temperature. Ensure you're using whole kernel dried corn and soaking for at least 12 hours. Next time, try reducing the oven temperature slightly or monitoring even more closely.
*
Uneven Browning: If some kernels are burnt while others are still pale, you likely didn't stir them frequently enough during baking. Ensure you're giving them a good toss every 10 minutes to promote even cooking.
Conclusion
There you have it – the comprehensive guide to making your own irresistible, crunchy, and wholesome
roasted corn kernel nuts. By skipping the store-bought options, you unlock a world of benefits: significant cost savings, complete control over ingredients for a healthier snack, and the ability to customize flavors to your heart's content. With just
4 basic ingredients, a little patience for soaking, and careful monitoring during baking, you can create a snack that not only satisfies your cravings but also leaves you feeling good about what you're eating. So, go ahead, grab that bag of dried corn, and prepare to embark on a delicious journey that will transform your snacking habits forever. Enjoy your perfectly crunchy, homemade creations!