Craving that irresistible, satisfying crunch of roasted corn nuts but wincing at the price tag or questioning the ingredient list of store-bought versions? What if we told you that making your own at home is not only incredibly easy but also requires just 4 simple ingredients? Say goodbye to expensive bags and hello to a homemade snack that’s healthier, more economical, and perfectly tailored to your taste buds. Get ready to discover the magic of easy homemade roasted corn kernel nuts 4 ways better than anything you’ll find in an aisle.
Why Ditch the Store-Bought for Homemade Roasted Corn Nuts?
For many of us, store-bought corn nuts are a nostalgic crunch-fest, a go-to for movie nights or road trips. However, a quick glance at the label often reveals a list of ingredients longer than necessary, coupled with a price point that makes enjoying them regularly a costly affair. This is where the homemade advantage truly shines:
- Unbeatable Value: A small bag of commercial corn nuts can easily set you back $4-$5 for what often feels like a single serving. Compare that to a 16 oz bag of dried corn kernels, which might cost around $2.50 and yields a substantial amount – enough to fill about 1.5 quart-sized mason jars! The savings are significant, making this a truly budget-friendly snack option. If you're keen on exploring just how much you can save, dive into Skip the Store: Make Crunchy, Cheap, & Healthy Corn Nuts for a detailed breakdown.
- Ingredient Control: When you make corn nuts from scratch, you're in charge. You skip the mystery oils, artificial flavors, and excessive sodium often found in packaged snacks. You know exactly what’s going into your body, making it a healthier choice for you and your family.
- Customizable Flavor: Love a classic salty crunch? You got it. Prefer a hint of sweetness to balance the savory? Easy. Want to experiment with a spicy kick or a smoky profile? The world is your oyster! Homemade means you can adjust the seasoning to perfection.
- Gentler on Your Teeth: One common complaint about store-bought corn nuts is their notorious hardness. Homemade versions, when prepared correctly, tend to have a more tender, yet still satisfyingly crunchy texture that’s less of a challenge for your pearly whites.
The Simple 4 Ingredients for Perfect Roasted Corn Kernel Nuts
The beauty of this recipe lies in its simplicity. You truly only need four core components to create a batch of delightful roasted corn kernel nuts 4 sure to disappear quickly!
1. The Right Corn is Key: Dried Large Kernel Corn
This is arguably the most crucial ingredient. Do not use popcorn kernels or fresh sweet corn. You need dried, large kernel corn, sometimes referred to as whole kernel maize or hominy corn. This type of corn has the ideal starch content and size to achieve that deep, satisfying crunch without being too tiny or too soft. You can often find it in bulk food sections of grocery stores, specialty health food stores, or even at agricultural feed stores (just ensure it's food-grade and untreated!).
2. Oil for Crispness and Adhesion
A neutral-flavored oil is best here. Think vegetable oil, canola oil, grapeseed oil, or even a light olive oil (though be mindful of olive oil's lower smoke point if roasting at higher temperatures). The oil helps the corn kernels achieve an even, golden crispness during roasting and also acts as a binder for your seasonings.
3. Salt for Essential Flavor
Fine sea salt or regular table salt works perfectly. Salt is non-negotiable for bringing out the inherent flavor of the corn and creating that classic savory snack profile.
4. A Touch of Sweetness (Optional but Recommended): Granulated Sugar
While optional, a small amount of granulated sugar works wonders. It doesn't make the corn nuts overtly sweet but rather helps to balance the saltiness and enhances the overall flavor, adding a subtle depth that makes them truly addictive. It also aids in achieving that beautiful golden-brown color.
Your Step-by-Step Guide to Crunchy Homemade Roasted Corn Nuts
Making your own roasted corn kernel nuts 4 is straightforward, but a few key steps ensure perfect results every time. Remember, patience in the prep phase pays off in the final crunch!
Prep Work: The Overnight Soak
- Soak the Corn: Place your dried large kernel corn in a large bowl and cover it generously with water. The corn will expand significantly, so use plenty of water. Let it soak at room temperature for at least 12 hours, or ideally overnight. This step is non-negotiable; it rehydrates the tough, dried kernels, making them tender enough to roast evenly and prevents them from being too hard to chew after baking.
- Rinse and Drain Thoroughly: After soaking, drain the corn completely. Rinse it under cold running water for a minute or two, then drain it again, making sure to remove as much excess water as possible. You can even pat the kernels dry with a clean kitchen towel for optimal crispness.
Seasoning and Coating
- Combine Ingredients: Transfer the drained corn kernels to a large mixing bowl. Add the oil, salt, and sugar.
- Toss to Coat: Mix everything thoroughly until every kernel is evenly coated. This ensures consistent flavor and helps them crisp up beautifully in the oven.
Baking for the Perfect Crunch
- Prepare Baking Sheet: Line a large baking sheet with parchment paper. This prevents sticking and makes cleanup a breeze. Spread the coated corn kernels in a single layer. Overcrowding the pan will steam the corn instead of roasting it, so use two sheets if necessary.
- Preheat Oven: Preheat your oven to 375°F (190°C).
- Bake and Stir: Place the baking sheet in the preheated oven. Now, here's the critical part: you must keep a close eye on them and stir frequently. Stir the kernels every 10 minutes to ensure even roasting and to prevent burning. Corn nuts can go from perfectly golden to burnt in a matter of minutes.
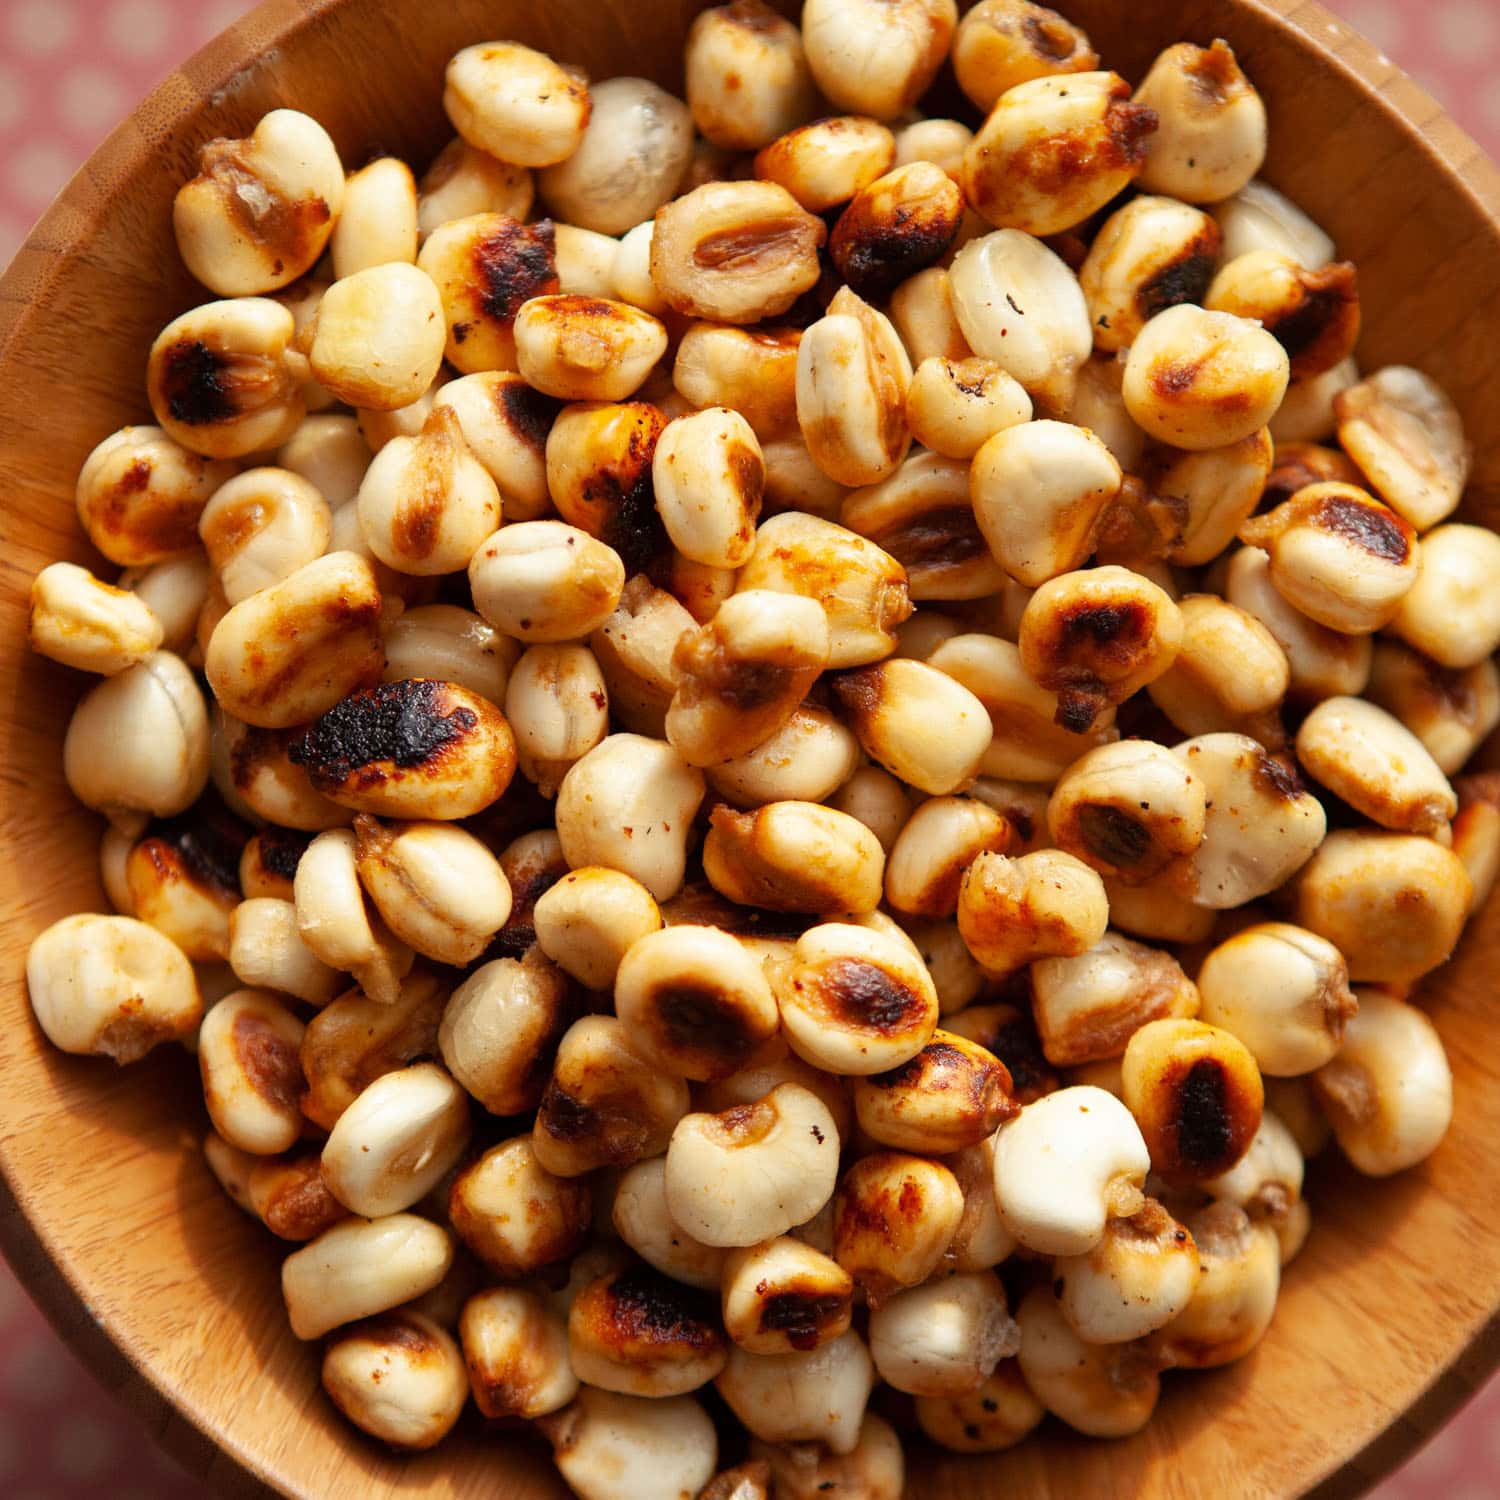
- Monitor for Doneness: The total baking time will vary depending on your oven and the specific corn variety, but it typically ranges from 20 to 40 minutes. Begin monitoring closely around the 20-minute mark. Look for a beautiful golden-brown color. They will feel firm and sound crunchy when tapped. For an even deeper dive into achieving that perfect crackle, check out Achieve Perfect Crunch: The Ultimate Homemade Corn Nut Recipe.
- Cool Completely: Once roasted to your liking, remove the corn nuts from the oven and let them cool completely on the baking sheet. They will continue to crisp up as they cool, developing their final, satisfying crunch.
Elevate Your Snack: Customization and Storage Tips
Once you've mastered the basic recipe for roasted corn kernel nuts 4 your way, it's time to get creative with flavors and ensure your delicious snack stays fresh.
Beyond Salt & Sugar: Flavor Variations
While the classic salt and sugar combination is fantastic, here are some ideas to take your corn nuts to the next level:
- Spicy Kick: Add a pinch of cayenne pepper, chili powder, or smoked paprika along with the salt and sugar.
- Cheesy Flavor: Toss with nutritional yeast (for a dairy-free "cheese" flavor) after they've cooled slightly, along with garlic powder and onion powder.
- Lime & Chili: After baking, spritz lightly with lime juice and toss with chili powder and a little extra salt.
- Garlic Herb: Mix in garlic powder, onion powder, and dried herbs like oregano or thyme before baking.
Pro Tip: For dry seasonings like chili powder or nutritional yeast, it's often best to toss them with the roasted corn nuts *after* they've come out of the oven. If you find the seasoning isn't sticking well, you can mist the warm corn nuts lightly with a bit of cooking spray or a tiny drizzle of oil before tossing.
Storing Your Homemade Treasure
Proper storage is essential to maintain the crunchiness of your homemade corn nuts:
- Airtight Containers: Once completely cooled, transfer your roasted corn kernel nuts 4 airtight containers like mason jars or sealed plastic containers.
- Sealed Bags: Heavy-duty freezer bags or ziplock bags also work well, just press out as much air as possible.
- Shelf Life: Stored correctly at room temperature, your homemade corn nuts will stay fresh and crunchy for several weeks. However, don't be surprised if they disappear much faster than that!
Troubleshooting Common Issues
- Too Soft/Chewy: This usually means they weren't roasted long enough or the oven temperature wasn't consistent. Pop them back in the oven and continue roasting, stirring frequently, until they reach the desired crispness.
- Burnt: If they're burnt, the oven was likely too hot, or they weren't stirred often enough. Next time, try a slightly lower temperature or commit to stirring more diligently.
- Unevenly Roasted: Spreading the corn in a single layer and stirring every 10 minutes are key to preventing this. Also, ensure your oven heats evenly.
Conclusion
Making your own easy homemade roasted corn kernel nuts 4 the simple ingredients is a game-changer. Not only do you get a delicious, satisfyingly crunchy snack that rivals any store-bought version, but you also save money, control the ingredients, and can customize the flavors to your heart's content. With just a little bit of prep and careful monitoring, you'll be enjoying these addictive crunchy treats in no time. So grab your dried corn, set aside an evening for soaking, and get ready to revolutionize your snacking!
