Achieve Perfect Crunch: The Ultimate Homemade Roasted Corn Kernel Nuts Recipe
There’s something undeniably satisfying about a perfectly crunchy snack. From movie nights to midday cravings, the irresistible snap and chew of a roasted corn kernel nut is a true delight. For years, many of us have relied on store-bought bags to satisfy this particular craving. However, the search for the ideal crispy bite often comes with compromises: high prices, mysterious additives, and a texture that can be a little too harsh on the teeth.
What if we told you that achieving that coveted crunch, along with superior flavor and complete control over your ingredients, is not only possible but incredibly easy? Get ready to transform your snacking game with our ultimate guide to making homemade easy homemade roasted corn kernel nuts: only 4 ingredients! That’s right – just four simple components are all you need to create a batch of crunchy delights that rival, if not surpass, anything you'll find on a grocery store shelf. Prepare to unlock a world of inexpensive, healthy, and utterly delicious snacking.
The Allure of the Homemade Crunch: Why Make Your Own Roasted Corn Kernel Nuts?
The decision to go homemade often stems from a desire for better quality, more control, and sometimes, a bit of adventure in the kitchen. When it comes to roasted corn kernel nuts, the benefits of making them yourself are abundant and compelling:
- Cost-Effectiveness: A small bag of store-bought corn nuts can easily set you back around $4 for what often feels like a single serving. Compare that to the cost of a 16 oz bag of dried field corn, which typically runs about $2.50 and yields significantly more. The savings quickly add up, making this a smart choice for budget-conscious snackers. You can enjoy a generous amount of these satisfying treats without breaking the bank.
- Ingredient Control: Ever scrutinized the ingredient list on a package of corn nuts? Often, you'll find a medley of preservatives, artificial flavors, and various oils. When you make them at home, you dictate every single ingredient. This means saying goodbye to unwanted additives and choosing high-quality salt, a touch of natural sugar, and your preferred healthy oil. It's a clean snack you can feel good about.
- Superior Taste and Texture: This is where homemade truly shines. While commercial corn nuts can sometimes be notoriously hard, leading to concerns about dental health, our homemade version offers a perfect balance. They’re delightfully crunchy without being overly aggressive, providing a satisfying bite that's still kind to your teeth. Plus, the ability to customize your seasonings allows for a fresher, more vibrant flavor profile that packaged versions simply can't match.
- Effortless Simplicity: Despite the overnight soaking, the active preparation time for these roasted corn kernel nuts 4 ingredients is surprisingly minimal. It's mostly hands-off, making it a perfect project for a lazy weekend afternoon or even a busy weeknight when you want to prep a healthy snack for the days ahead.
Unlocking the Secret: Choosing the Right Corn and Essential Ingredients
The foundation of any great recipe lies in its ingredients, and for homemade corn nuts, the type of corn you choose is paramount. This isn't a job for your standard popcorn kernels or canned sweet corn.
The Critical Choice: Dried Field Corn (Maize)
The "secret ingredient" to achieving that authentic corn nut texture is dried field corn, also known as maize. This is different from the sweet corn you eat on the cob or the kernels used for popcorn. Field corn has larger, harder kernels designed for drying and processing, making it ideal for the transformation into a crunchy snack. Popcorn kernels are too small, and sweet corn lacks the robust structure needed to hold up to the roasting process.
Where to find it: Look for dried field corn in the international or ethnic foods aisle of larger supermarkets, especially in sections dedicated to Mexican or Latin American cuisine. It's often labeled as "maize for hominy" or simply "dried corn kernels." Specialty health food stores or online retailers are also excellent sources if you're having trouble locating it locally.
The Other Essential 3: Salt, Sugar, and Oil
Beyond the corn, our ultimate skip the store: make crunchy, cheap, & healthy corn nuts recipe only calls for three more basic ingredients, making it a true roasted corn kernel nuts 4 ingredient wonder:
- Salt: Essential for bringing out the corn's natural flavor and enhancing the overall savoriness. We recommend fine sea salt or kosher salt for even distribution.
- Sugar: A touch of sugar provides a lovely caramelized note during roasting and helps achieve that golden-brown color. It perfectly balances the saltiness, creating an addictive sweet and savory combination.
- Oil: This is crucial for crispiness and flavor. A neutral, high-smoke-point oil like avocado oil, grapeseed oil, or a light olive oil works best. You only need a couple of tablespoons to coat the kernels evenly.
The Journey to Perfect Crunch: Step-by-Step Homemade Roasted Corn Kernel Nuts
Once you have your ingredients, the process is straightforward. The key to success lies in proper preparation and attentive roasting.
Step 1: The All-Important Soak (12 Hours)
This step is non-negotiable. Place your dried field corn kernels in a large bowl and cover them with plenty of cold water. Ensure there's at least an inch or two of water above the corn, as they will expand. Let them soak at room temperature for a minimum of 12 hours, or ideally overnight. Soaking rehydrates the tough kernels, softening them just enough to allow for thorough cooking and the development of that signature crunchy texture without becoming overly hard.
After soaking, thoroughly rinse and drain the corn kernels. This removes any starchy residue and ensures they are clean and ready for seasoning. Pat them as dry as possible with a clean kitchen towel or paper towels – excess moisture can hinder crisping.
Step 2: Season and Prepare for Roasting
Transfer the rinsed and drained corn kernels to a clean bowl. Add your salt and sugar, then pour in the oil. Toss everything together thoroughly, ensuring each kernel is evenly coated. This even coating is vital for consistent flavor and browning during the roasting process.
Preheat your oven to a moderate temperature, around 350°F (175°C). Line a large baking sheet with parchment paper. This prevents sticking and makes cleanup a breeze. Spread the seasoned corn kernels in a single layer on the prepared baking sheet. Avoid overcrowding, as this can steam the corn instead of roasting it, leading to a less crispy result. If necessary, use two baking sheets.
Step 3: The Critical Roast and Monitor
Place the baking sheet(s) in the preheated oven. Now, here's where vigilance pays off. You must keep a close eye on your corn nuts and stir them frequently.
- Start by roasting for 10-15 minutes.
- Then, remove the tray, stir the kernels thoroughly to ensure even cooking, and return them to the oven.
- Repeat this stirring process every 8-10 minutes.
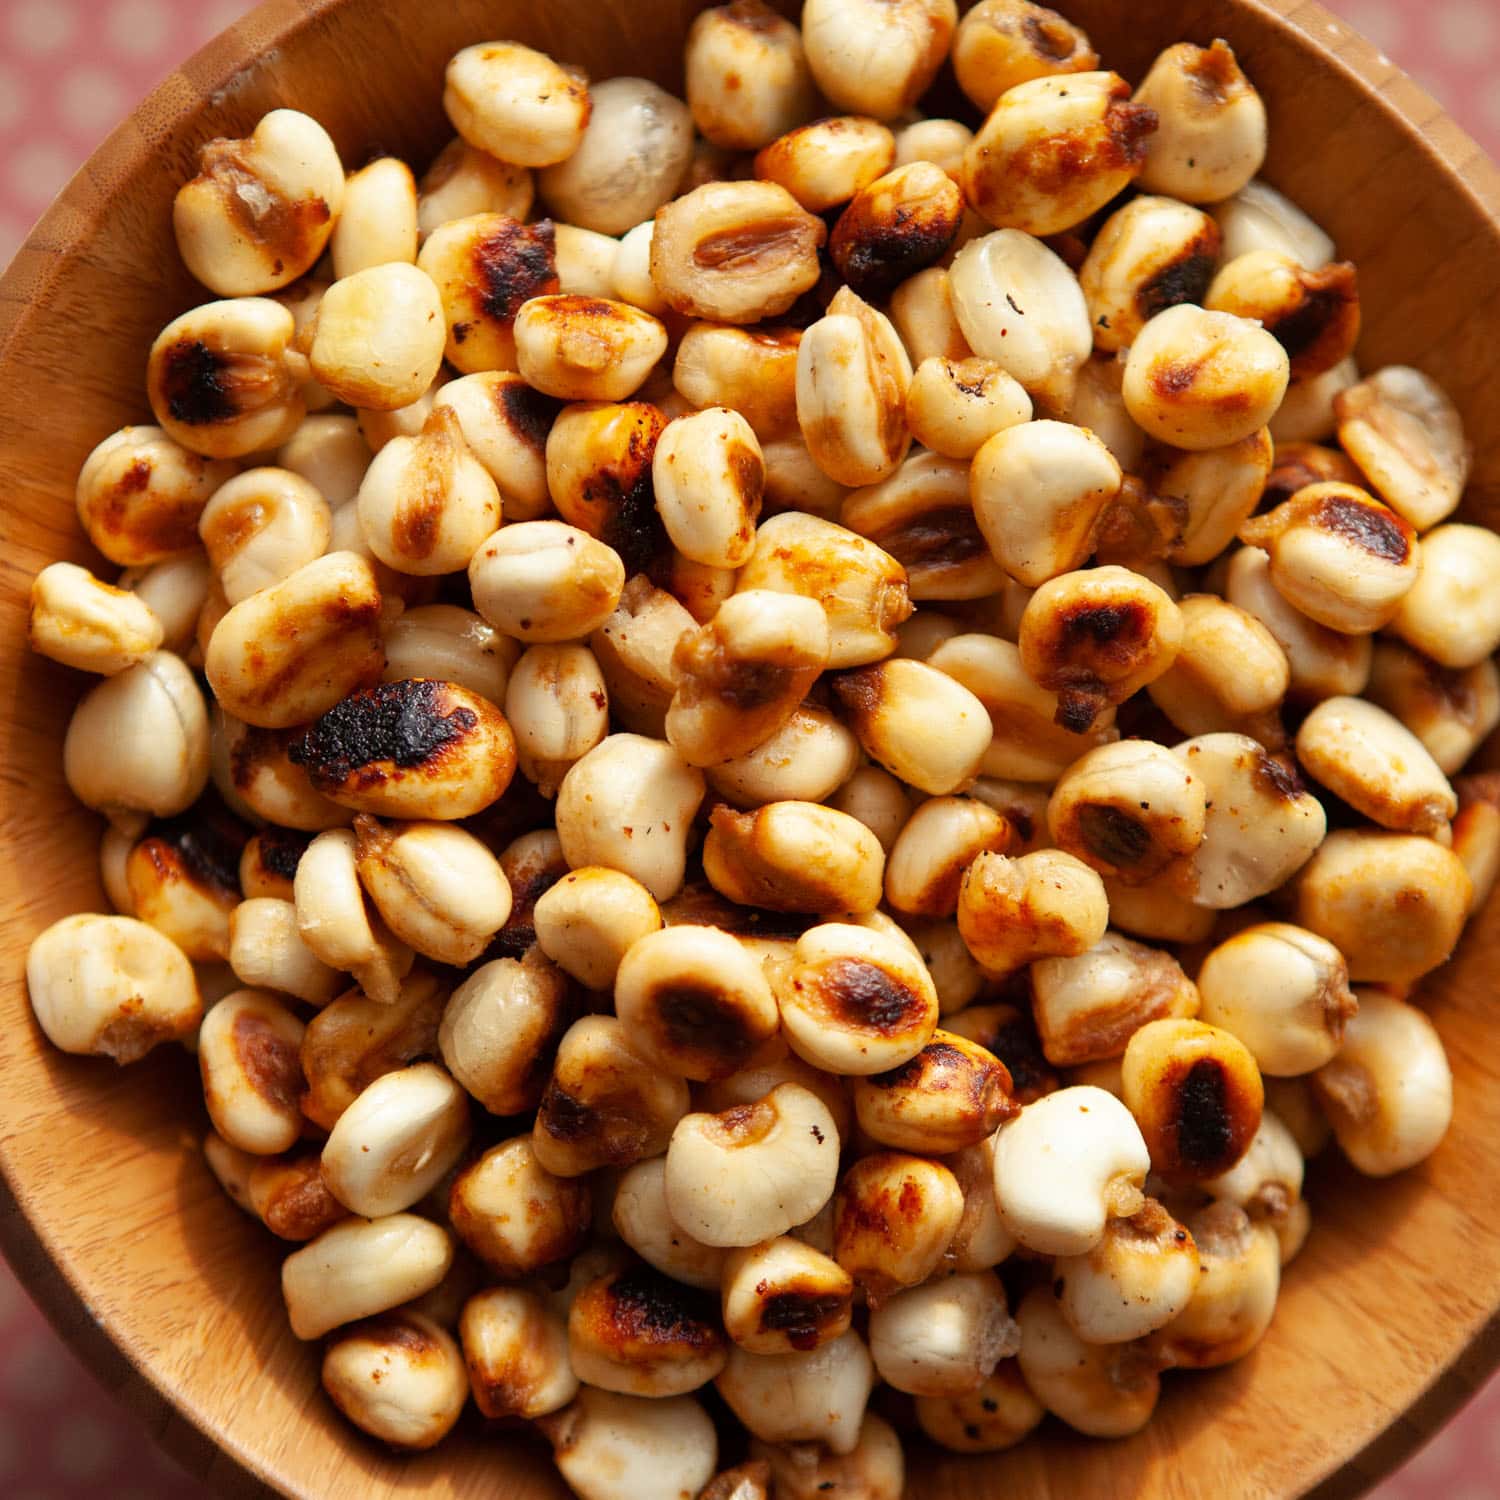
The total baking time will vary depending on your oven and the specific corn variety, typically ranging from 20 to 40 minutes. Begin monitoring very closely after the 20-minute mark. The corn can go from perfectly golden to burnt in a matter of minutes. Look for a deep, golden-brown color and a visibly crunchy appearance. They should also feel dry to the touch.
Once they reach your desired level of crispness and color, remove them from the oven. Don't worry if they don't feel incredibly hard right away; they will continue to crisp up as they cool. Let them cool completely on the baking sheet before transferring to a storage container.
Beyond Basic: Elevate Your Roasted Corn Kernel Nuts with Flavor Variations
While the classic salt and sugar combination is a beloved staple, one of the greatest joys of making homemade roasted corn kernel nuts 4 ingredients is the freedom to experiment with an array of flavor profiles. Once you've mastered the basic recipe, the possibilities are endless:
- Spicy Kick: Add a pinch of cayenne pepper, chili powder, or smoked paprika along with the salt and sugar for a fiery version. For a truly bold flavor, toss them with a dash of hot sauce after roasting and before cooling.
- Garlic & Herb: Incorporate garlic powder, onion powder, and a sprinkle of dried herbs like oregano or thyme for a savory, aromatic snack.
- Cheesy Goodness: For a surprisingly savory and dairy-free option, add a tablespoon of nutritional yeast after roasting for a "cheesy" flavor that's both healthy and delicious.
- Sweet & Spicy: Combine brown sugar with chili powder and a hint of cinnamon for a complex, warm flavor profile.
- Global Inspirations: Experiment with international spice blends like Tajín (lime, chili, salt), curry powder, or za'atar for a unique snacking experience.
Remember to adjust the seasonings to your personal preference. It's often best to add additional spices after the basic salt, sugar, and oil coating, ensuring they adhere well to the kernels.
Tips for Success & Storage: Mastering Your Crunchy Snack
Making homemade roasted corn kernel nuts is rewarding, and a few extra tips can ensure every batch is a resounding success:
- Don't Skimp on Soaking: An adequately soaked kernel is key to the perfect texture. If your corn nuts turn out too hard, insufficient soaking is likely the culprit.
- Even Spreading is Key: Overcrowding the baking sheet leads to steaming, not roasting. Give your kernels space to breathe and crisp up.
- Cool Completely: Resist the urge to snack immediately! Corn nuts achieve their ultimate crunch only after cooling down completely.
- Listen and Look: Beyond the timer, trust your senses. You'll hear a distinct popping and crackling sound as they dry out, and the visual cue of golden-brown is your best indicator of doneness.
- Oven Variations: Every oven is different. Your first batch might be a learning curve for ideal temperature and time. Don't be discouraged if it takes a slight adjustment.
Storing Your Homemade Roasted Corn Kernel Nuts
Once completely cooled, store your homemade corn nuts in an airtight container to maintain their freshness and crunch. Mason jars, sealed plastic containers, or heavy-duty Ziploc bags work perfectly. A single batch typically fills about 1 to 1.5 quart-sized mason jars, providing a generous supply of delicious snacks. Stored properly, they will retain their crunch and flavor for up to two weeks, though we doubt they'll last that long!
Embrace the satisfaction of creating your own perfectly crunchy, incredibly flavorful, and healthier snack right in your kitchen. With just four simple ingredients and a little patience, you're on your way to enjoying the best roasted corn kernel nuts you've ever tasted. Happy snacking!
